

Adding a cover to your recliner is a practical way to protect your furniture, refresh its look, and extend its lifespan. Whether you want to shield your chair from spills, pet hair, or daily wear, learning how to install a recliner chair cover can make a noticeable difference in your living space. This guide will walk you through the entire process, from preparation to finishing touches, ensuring a snug and professional result.
Before diving into the installation steps, it’s important to select a cover that matches your recliner’s size and style. A well-fitted slipcover not only enhances comfort but also preserves the chair’s functionality, especially for seniors or anyone seeking extra support. For more details on the advantages of recliner chairs, check out this comprehensive overview of lift chair recliner benefits.
Why Use a Recliner Slipcover?
Slipcovers offer a simple solution for maintaining the appearance and cleanliness of your favorite chair. Here are some key reasons to consider using one:
- Protection: Shields the upholstery from stains, spills, and pet hair.
- Style Update: Instantly refreshes the look of your recliner without the cost of new furniture.
- Easy Maintenance: Most covers are machine washable, making cleaning hassle-free.
- Comfort: Adds an extra layer of softness and can even improve support.
Choosing the right cover is the first step in learning how to install a recliner chair cover effectively. Measure your chair carefully and select a material that suits your lifestyle and décor.
Preparing Your Recliner for a New Cover
Proper preparation ensures a smooth installation and a polished final look. Follow these steps before fitting your new slipcover:
- Clean the Recliner: Vacuum the chair thoroughly to remove dust, crumbs, and pet hair. Wipe down any hard surfaces with a damp cloth.
- Remove Accessories: Take off any detachable cushions, pillows, or throws. If your recliner has removable armrests or headrests, detach them if possible.
- Check for Damage: Inspect the chair for loose parts or sharp edges that could snag the fabric. Repair or smooth out any issues before proceeding.
Once your recliner is clean and ready, unpack the slipcover and identify each section. Most covers come with labels or tags indicating the front, back, arms, and seat areas.
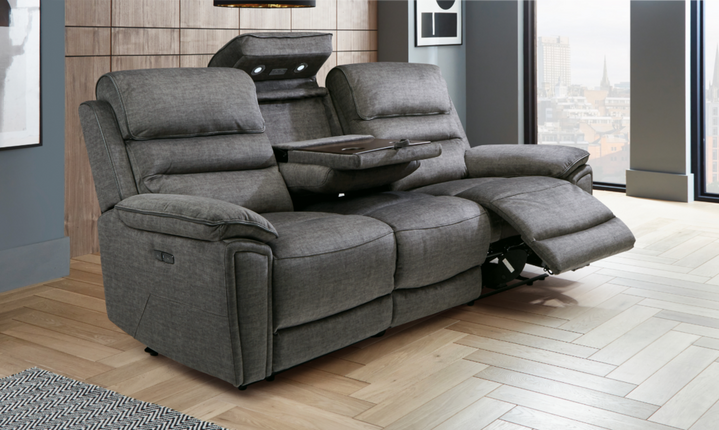
Step-by-Step Instructions for Fitting a Recliner Cover
Installing a slipcover is straightforward if you follow a systematic approach. Here’s a detailed breakdown:
1. Identify the Cover Sections
Most recliner covers are designed in multiple pieces or have sewn-in labels. Lay out each part and match it to the corresponding area of your chair. This step is crucial for a smooth installation and helps avoid confusion later on.
2. Start with the Backrest
Begin by draping the cover over the backrest. Align the seams with the edges and pull the fabric down so it covers the entire back. If your cover has elastic bands or straps, secure them underneath or behind the chair for a tight fit.
3. Fit the Seat and Arms
Next, move on to the seat and arm sections. Tuck the fabric into the creases between the seat, arms, and backrest. Use foam sticks or rolled towels to keep the cover in place and prevent shifting when the chair is in use.
4. Adjust for the Footrest
Many recliners have a separate footrest section. Pull the cover over the extended footrest, smoothing out any wrinkles. If your slipcover is a one-piece design, ensure the fabric stretches evenly when the footrest is both open and closed.
5. Secure and Smooth
Once all sections are in place, step back and check for any uneven areas or bunching. Tuck excess fabric tightly into the gaps and adjust the fit as needed. Fasten any ties, straps, or Velcro closures to keep everything secure.

Tips for a Perfect Fit and Long-Lasting Results
- Choose Stretch Fabrics: Materials with spandex or elastic fibers adapt better to the contours of your chair, reducing wrinkles and slippage.
- Use Tucking Tools: Foam inserts or pool noodles can be placed in the creases to hold the cover in place.
- Wash Before Use: Launder the slipcover before installation to soften the fabric and remove any packaging odors.
- Regular Maintenance: Smooth out the cover after each use and wash it as recommended to keep it looking fresh.
Following these tips will help you achieve a tailored look and ensure your recliner stays protected for years to come.
Common Mistakes to Avoid When Covering Your Recliner
Even with the best intentions, a few common errors can affect the outcome. Here’s what to watch out for:
- Incorrect Sizing: Always measure your recliner and compare it to the manufacturer’s sizing chart before purchasing a cover.
- Skipping Preparation: Failing to clean the chair or remove accessories can lead to a poor fit and premature wear.
- Improper Tucking: Not securing the fabric in the creases can cause the cover to shift or bunch up during use.
- Ignoring Instructions: Each slipcover may have unique features or installation steps. Refer to the included guide for the best results.
By avoiding these pitfalls, you’ll make the process of how to install a recliner chair cover much smoother and more effective.
Maintaining Your Recliner Cover
Proper care extends the life of your slipcover and keeps your recliner looking its best. Most covers are machine washable—just follow the care instructions on the label. For spot cleaning, use a mild detergent and a damp cloth. Regularly adjust and retuck the fabric to maintain a neat appearance.
Frequently Asked Questions
Can I use a universal slipcover on any recliner?
Universal slipcovers are designed to fit a wide range of recliner shapes and sizes, but for the best results, choose one that closely matches your chair’s dimensions. Always check the product’s sizing guide before purchasing.
How do I keep the cover from slipping?
To prevent slippage, use foam inserts or tucking tools in the creases. Stretch fabrics and covers with elastic bands or straps also help maintain a secure fit.
Is it difficult to operate the recliner after installing a cover?
Most quality slipcovers are designed to accommodate the chair’s movement. Ensure the fabric is not too tight and that all moving parts are free from obstruction. Test the recliner after installation and make adjustments as needed.